The Model Context Protocol (MCP) is an open standard introduced by Anthropic that enables large language models (LLMs) to securely interact with external tools, systems, and data, acting as a universal interface for AI workflows. By connecting Orca to MCP, security teams can query and act on their cloud security environment through natural language, without the need for custom integrations or dashboards.
AI discovery queries you run through the Orca MCP server consume AI credits.
The Orca Security MCP Server empowers your cloud security workflows with:
- Unified security context: Access alerts, asset details, compliance data, and documentation in one place to simplify investigations and reduce noise.
- Natural language cloud visibility: Ask plain-language questions about your cloud configurations, vulnerabilities, and posture directly through LLMs like Claude or Cursor.
- Investigation acceleration: Pivot from an alert to its related assets, risks, and documentation in seconds, making incident response faster and more effective.
- Proactive risk reduction: Go beyond reactive queries, use MCP to detect hidden risks and compliance gaps before they become incidents, strengthening your overall security posture.
AI Agent Enablement at Scale
Since MCP is an open standard, you can easily build and scale AI agents that work seamlessly with Orca. This unlocks new automation opportunities, from continuous monitoring to automated triage, while ensuring every agent runs against a consistent, secure interface.
You can connect the Orca MCP server to the following AI agents, among others:
Prerequisites
Server URL
The endpoint you use depends on your authentication method. For OAuth, use the central endpoint. It works for any region:
https://mcp.orcasecurity.io
For token-based auth, use your organization's regional endpoint. The central endpoint doesn't support token authentication:
- US:
https://api.orcasecurity.io/mcp - EU:
https://api.eu.orcasecurity.io/mcp - AU:
https://api.au.orcasecurity.io/mcp - IN:
https://api.in.orcasecurity.io/mcp - SA:
https://api.sa.orcasecurity.io/mcp
Authentication
Orca supports the following authentication methods for the MCP server. The methods available depend on the client.
- OAuth 2.0: Recommended for interactive use. Your client handles the browser flow automatically: A browser window opens, you approve access, and the client manages the tokens.
- API token: For automated pipelines and services that can't use browser-based authentication. Create an API token in your Orca account before starting.
Connecting Claude Code to the Orca MCP Server
Claude Code is Anthropic's command-line coding agent. It natively supports remote HTTP MCP servers and both OAuth and API token authentication, so you can query and act on your Orca environment directly from the terminal.
Using OAuth 2.0
OAuth is the recommended method for interactive use. Your client handles the entire browser flow. You don't need to create or manage tokens manually.
To connect Claude Code using OAuth:
- In Terminal, run:
claude mcp add --transport http orca https://mcp.orcasecurity.io
- Run
claudeto open Claude Code. - Run
/mcpand select Orca MCP Server. - Select Authenticate.
A browser window opens to the Orca authorization page. - Review the access request and click Approve.
- Return to Claude Code.
The status shows connected and authenticated. - Test the connection using the query examples.
If the browser doesn't open automatically, copy the URL displayed in Claude Code and open it manually.
Using an API Token
Use an API token for non-interactive setups, such as scripts or CI pipelines where browser authentication isn't available.
To connect Claude Code using an API token:
- In Terminal, run the following, replacing
YOUR_REGIONAL_ENDPOINTwith your regional endpoint. For example,https://api.orcasecurity.io/mcp, andYOUR_ORCA_TOKENwith your Orca API token:
claude mcp add --transport http orca YOUR_REGIONAL_ENDPOINT --header "Authorization: Token YOUR_ORCA_TOKEN"
- Run
claudeto open Claude Code. - Test the connection using the query examples.
Connecting Claude Code via Claude Desktop
Claude Desktop is a graphical interface for Claude Code. Use it to connect to the Orca MCP server through the built-in Connectors interface, without needing a terminal.
To connect Claude Desktop to the Orca MCP Server:
-
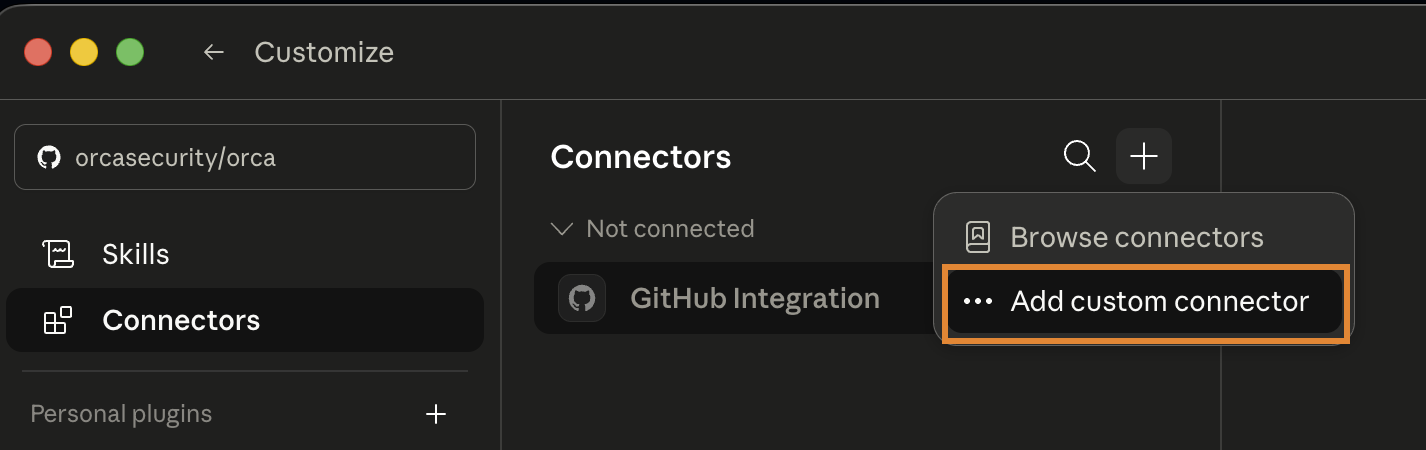
In Claude Desktop, go to Customize > Connectors.
-
Click + and select Add custom connector.
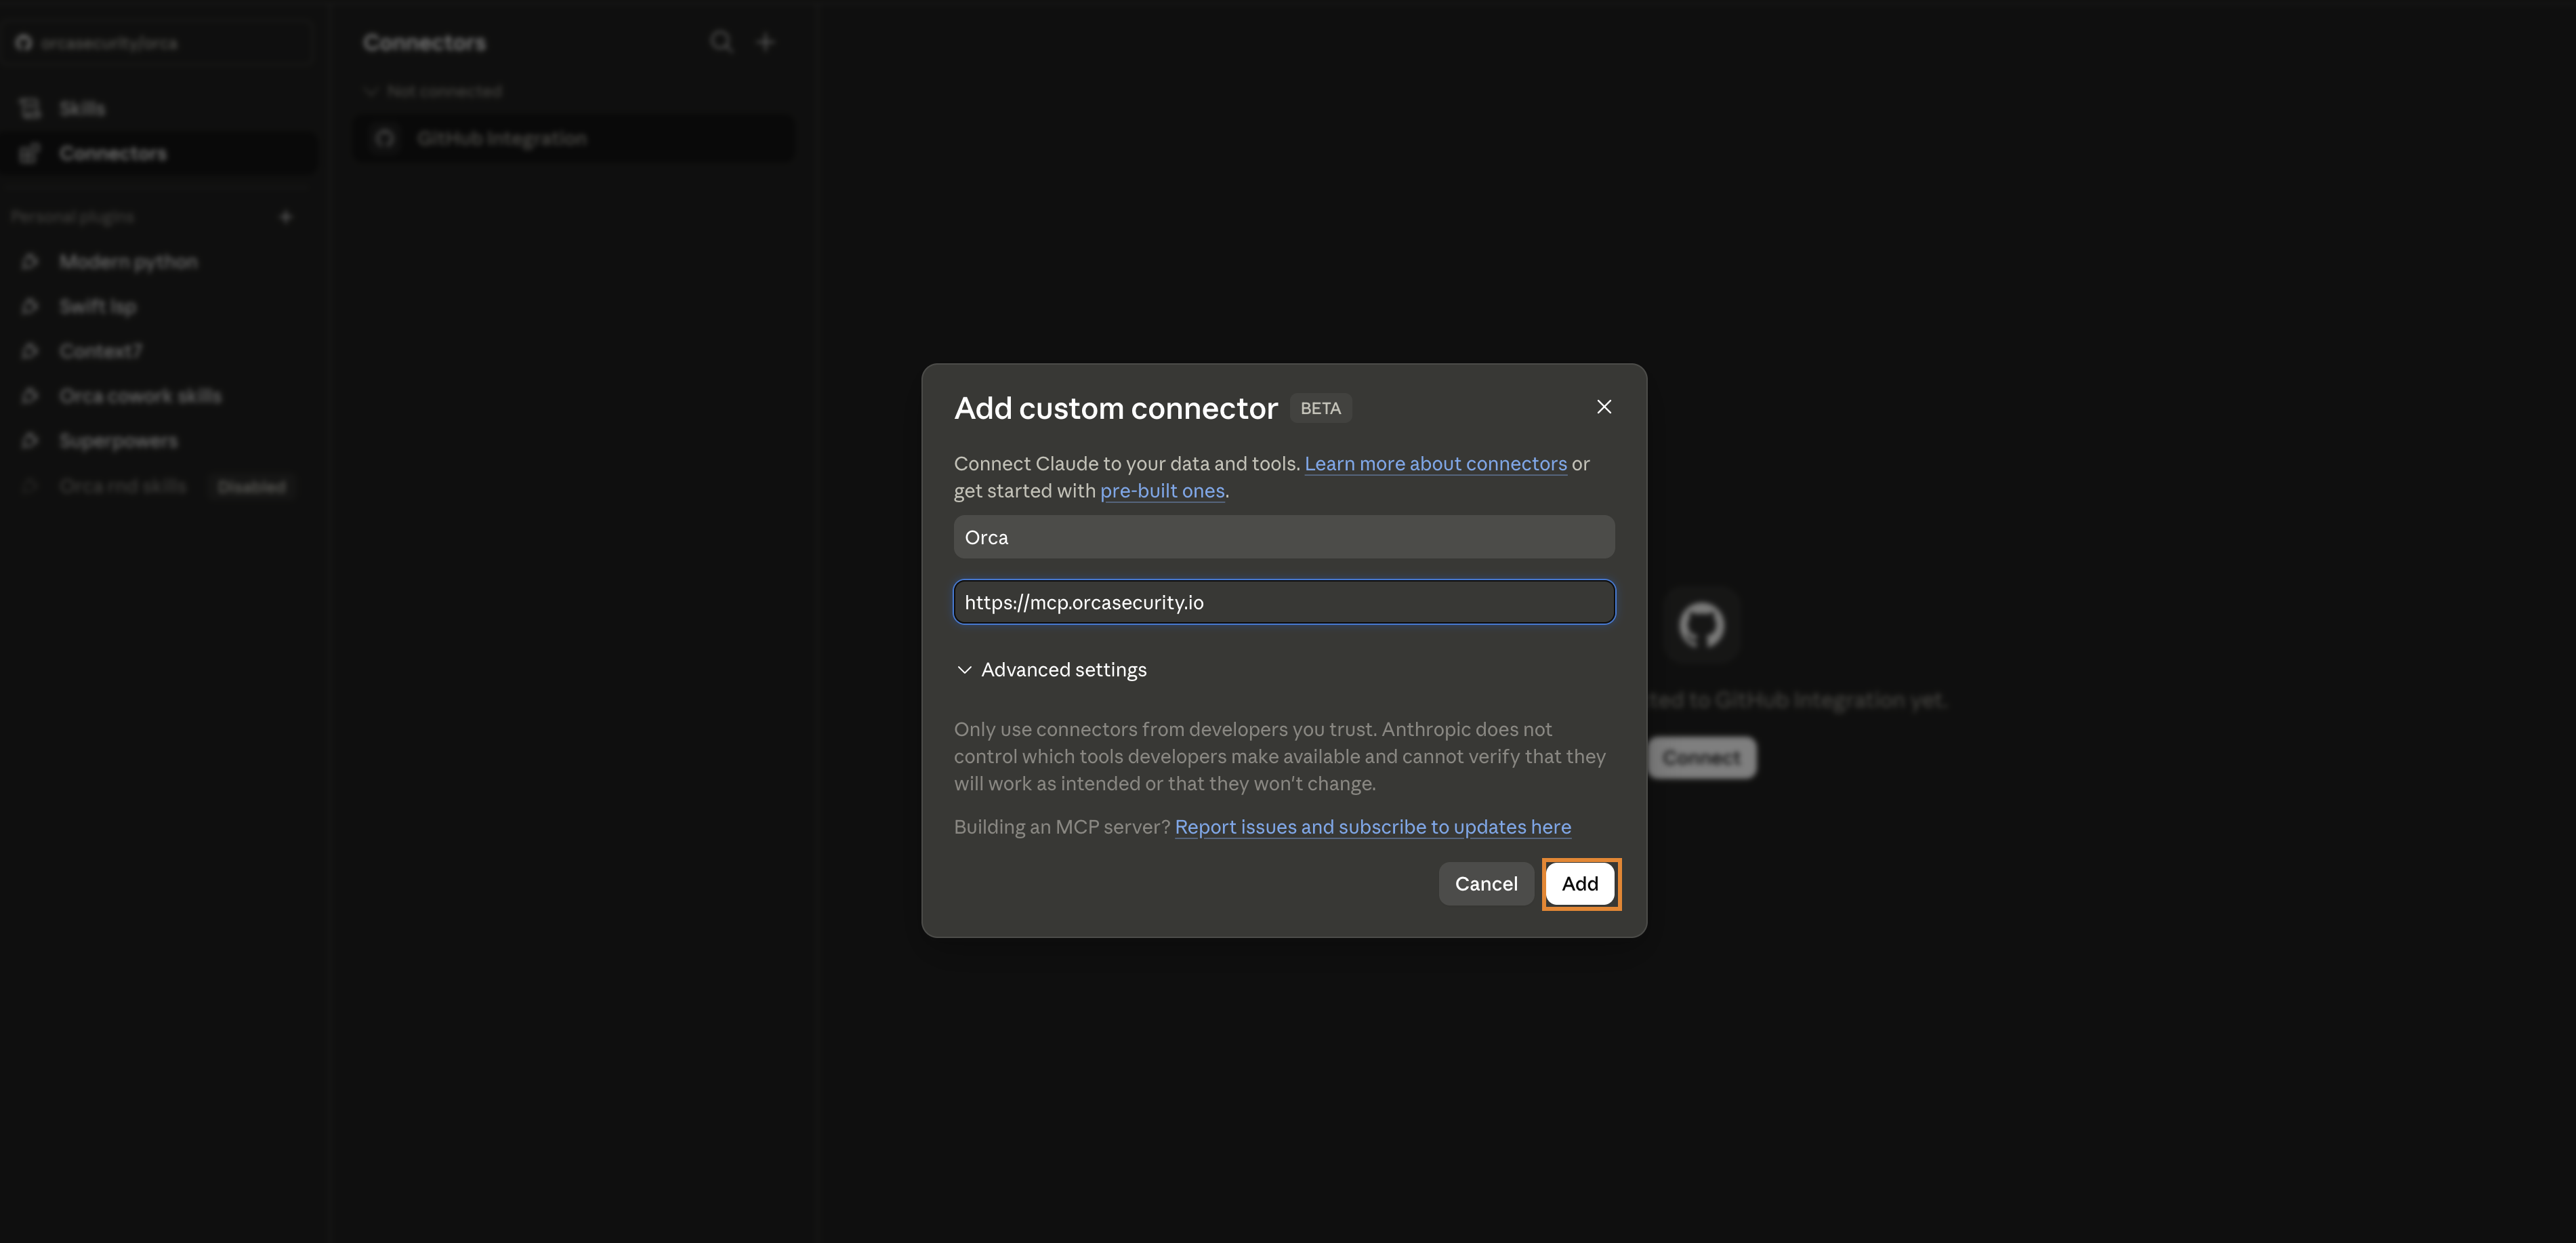
-
Enter a Name, for example, Orca, and the Remote MCP server URL:
https://mcp.orcasecurity.io. -
Click Add.
-
Click Connect and complete the authorization in the browser.
-
Test the connection using the query examples.
Connecting Cursor to the Orca MCP Server
Cursor supports remote HTTP MCP servers and both OAuth and API token authentication.
To connect Cursor to the Orca MCP Server:
-
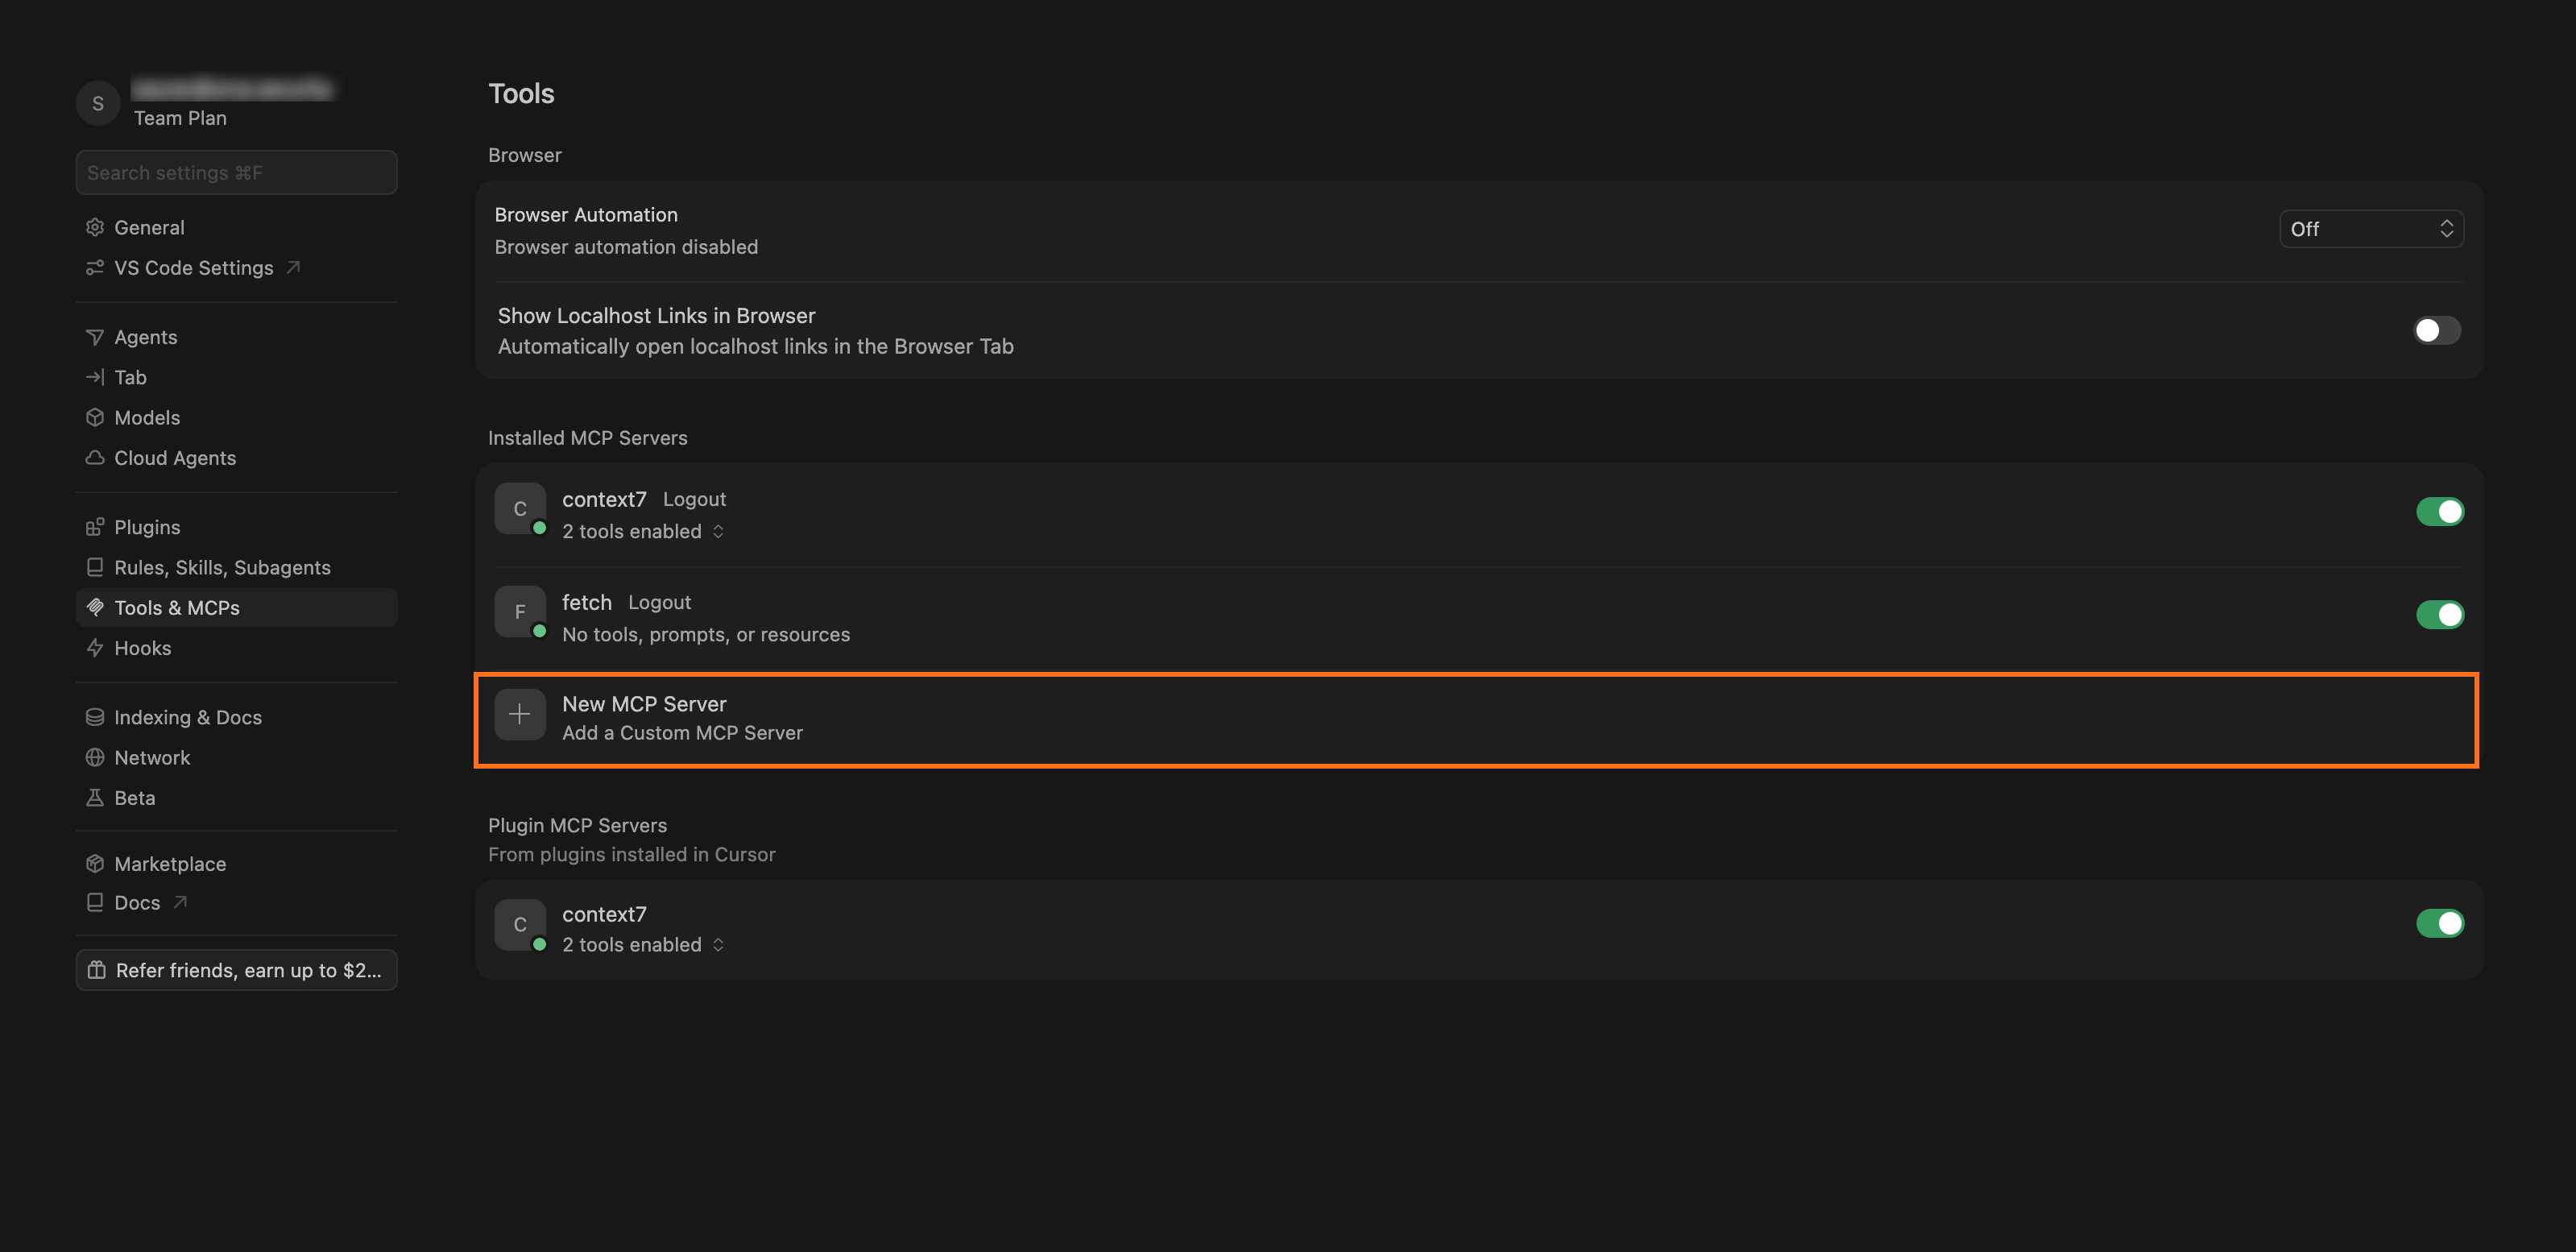
In Cursor, go to Settings > Tools & MCPs.
-
Under Installed MCP Servers, click + next to New MCP Server.
-
In the mcp.json file that opens, add the following entry based on your authentication method.
For OAuth authentication (recommended):
{
  "mcpServers": {
    "orca": {
      "url": "https://mcp.orcasecurity.io"
    }
  }
}
For API token authentication:{ "mcpServers": { "orca": { "url": "YOUR_REGIONAL_ENDPOINT", "headers": { "Authorization": "Token YOUR_ORCA_TOKEN" } } } }Replace
YOUR_REGIONAL_ENDPOINTwith your regional endpoint, for example,https://api.orcasecurity.io/mcp. -
Save the file.
For OAuth, Cursor handles authentication automatically on first connection. -
Test the connection using the query examples.
Connecting Microsoft Copilot Studio to the Orca MCP Server
Microsoft Copilot Studio connects to the Orca MCP server through its agent tools interface and supports both OAuth and API key authentication.
To connect Microsoft Copilot Studio to the Orca MCP Server using an API token:
- In Copilot Studio, select Agents in the left navigation.
- Select your agent from the list of agents and go to the Tools tab for your agent.
- Click Add a tool and then select New tool.
- Select Model Context Protocol.
The Add a Model Context Protocol server dialog appears. - Fill in the following fields in the Add a Model Context Protocol server dialog. The agent orchestrator uses this information to identify whether to call your server.
- Server name: The name of your server, for example, Orca MCP.
- Server description: Write a brief, but clear description of what your MCP server does.
- Server URL: Enter your regional endpoint, for example,
https://api.orcasecurity.io/mcp.The central endpoint doesn't support token authentication.
- Under Authentication, select API key as the authentication type to use when connecting to the server.
- In the Type section, select Header.
- In the header name field, type Authorization.
- In the header value field, enter your API token prefixed with
Token. For example,Token <your_API_token>. - Click Create.
Wait for the notification that your custom connector has been created. - Click Not connected and select Create new connection.
- Enter your Orca API token and click Connect.
The Orca MCP server is now connected to Copilot Studio. - Click Add to Agent.
The Microsoft documentation covers additional setup options and troubleshooting.
Test the Copilot Studio connection using the following query examples.
Connecting ChatGPT to the Orca MCP Server
Connecting ChatGPT to the Orca MCP server lets you query and act on your cloud security environment using natural language, directly from the ChatGPT interface.
To connect ChatGPT to the Orca MCP Server using OAuth:
-
In ChatGPT, go to Settings > Apps.
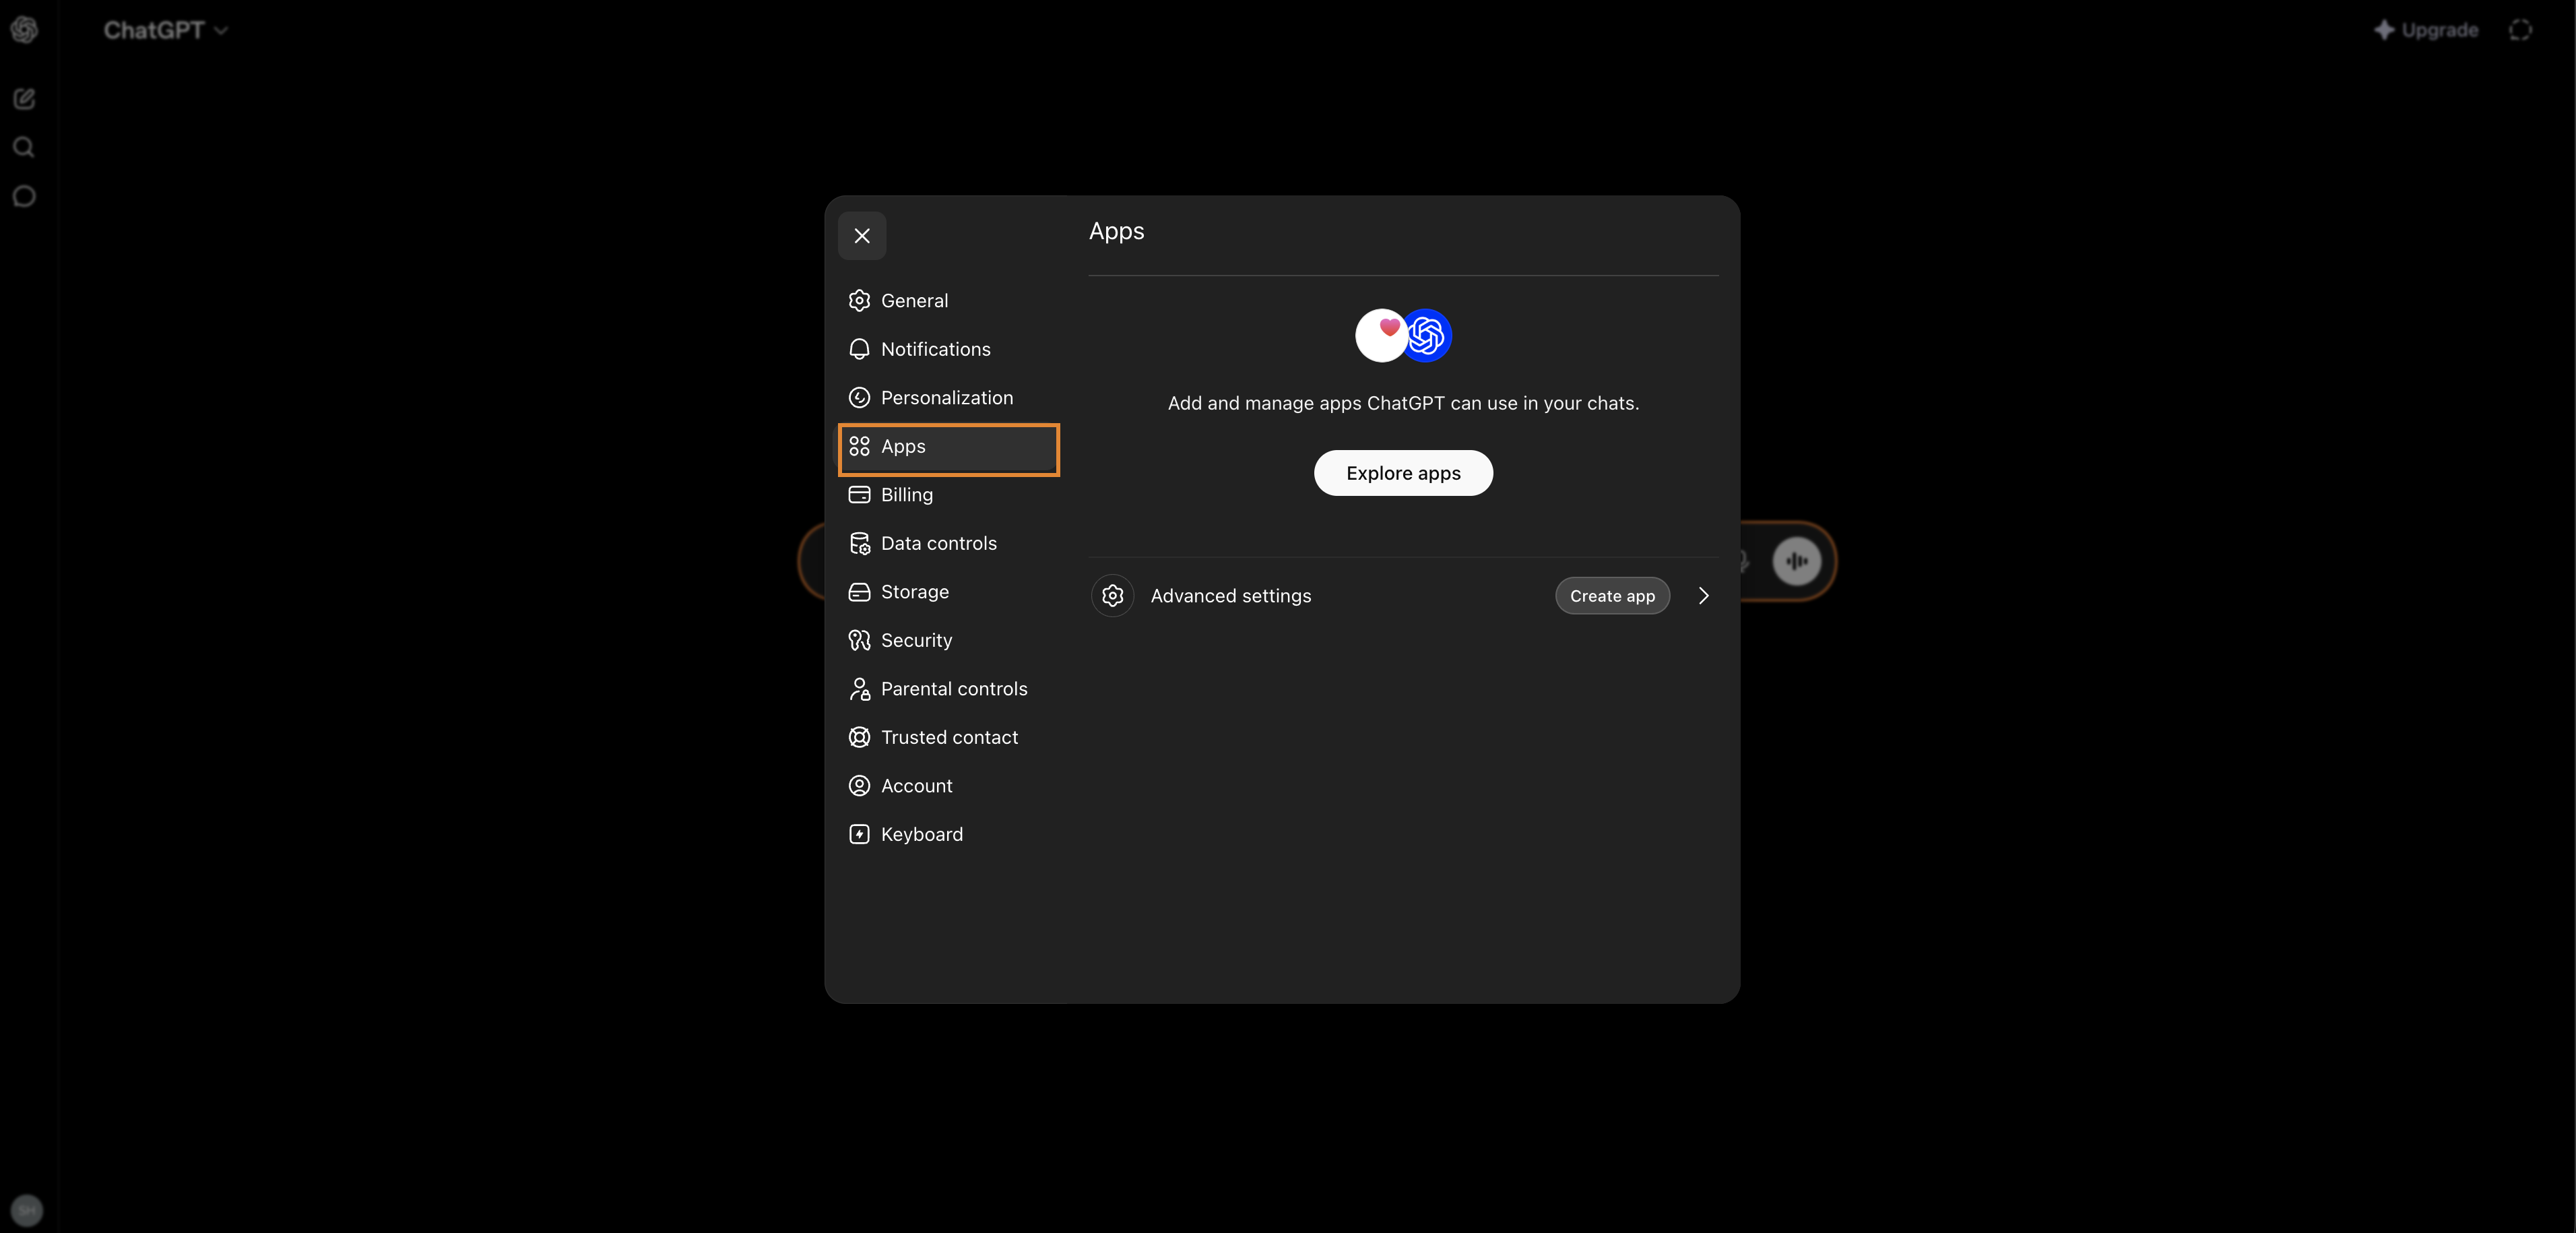
-
Click Create app.
-
Fill in the following fields in the New App dialog:
- Name: Enter a name for the app, for example, Orca.
- MCP Server URL:
https://mcp.orcasecurity.io - Authentication: Select OAuth.
-
Select the I understand and want to continue checkbox.
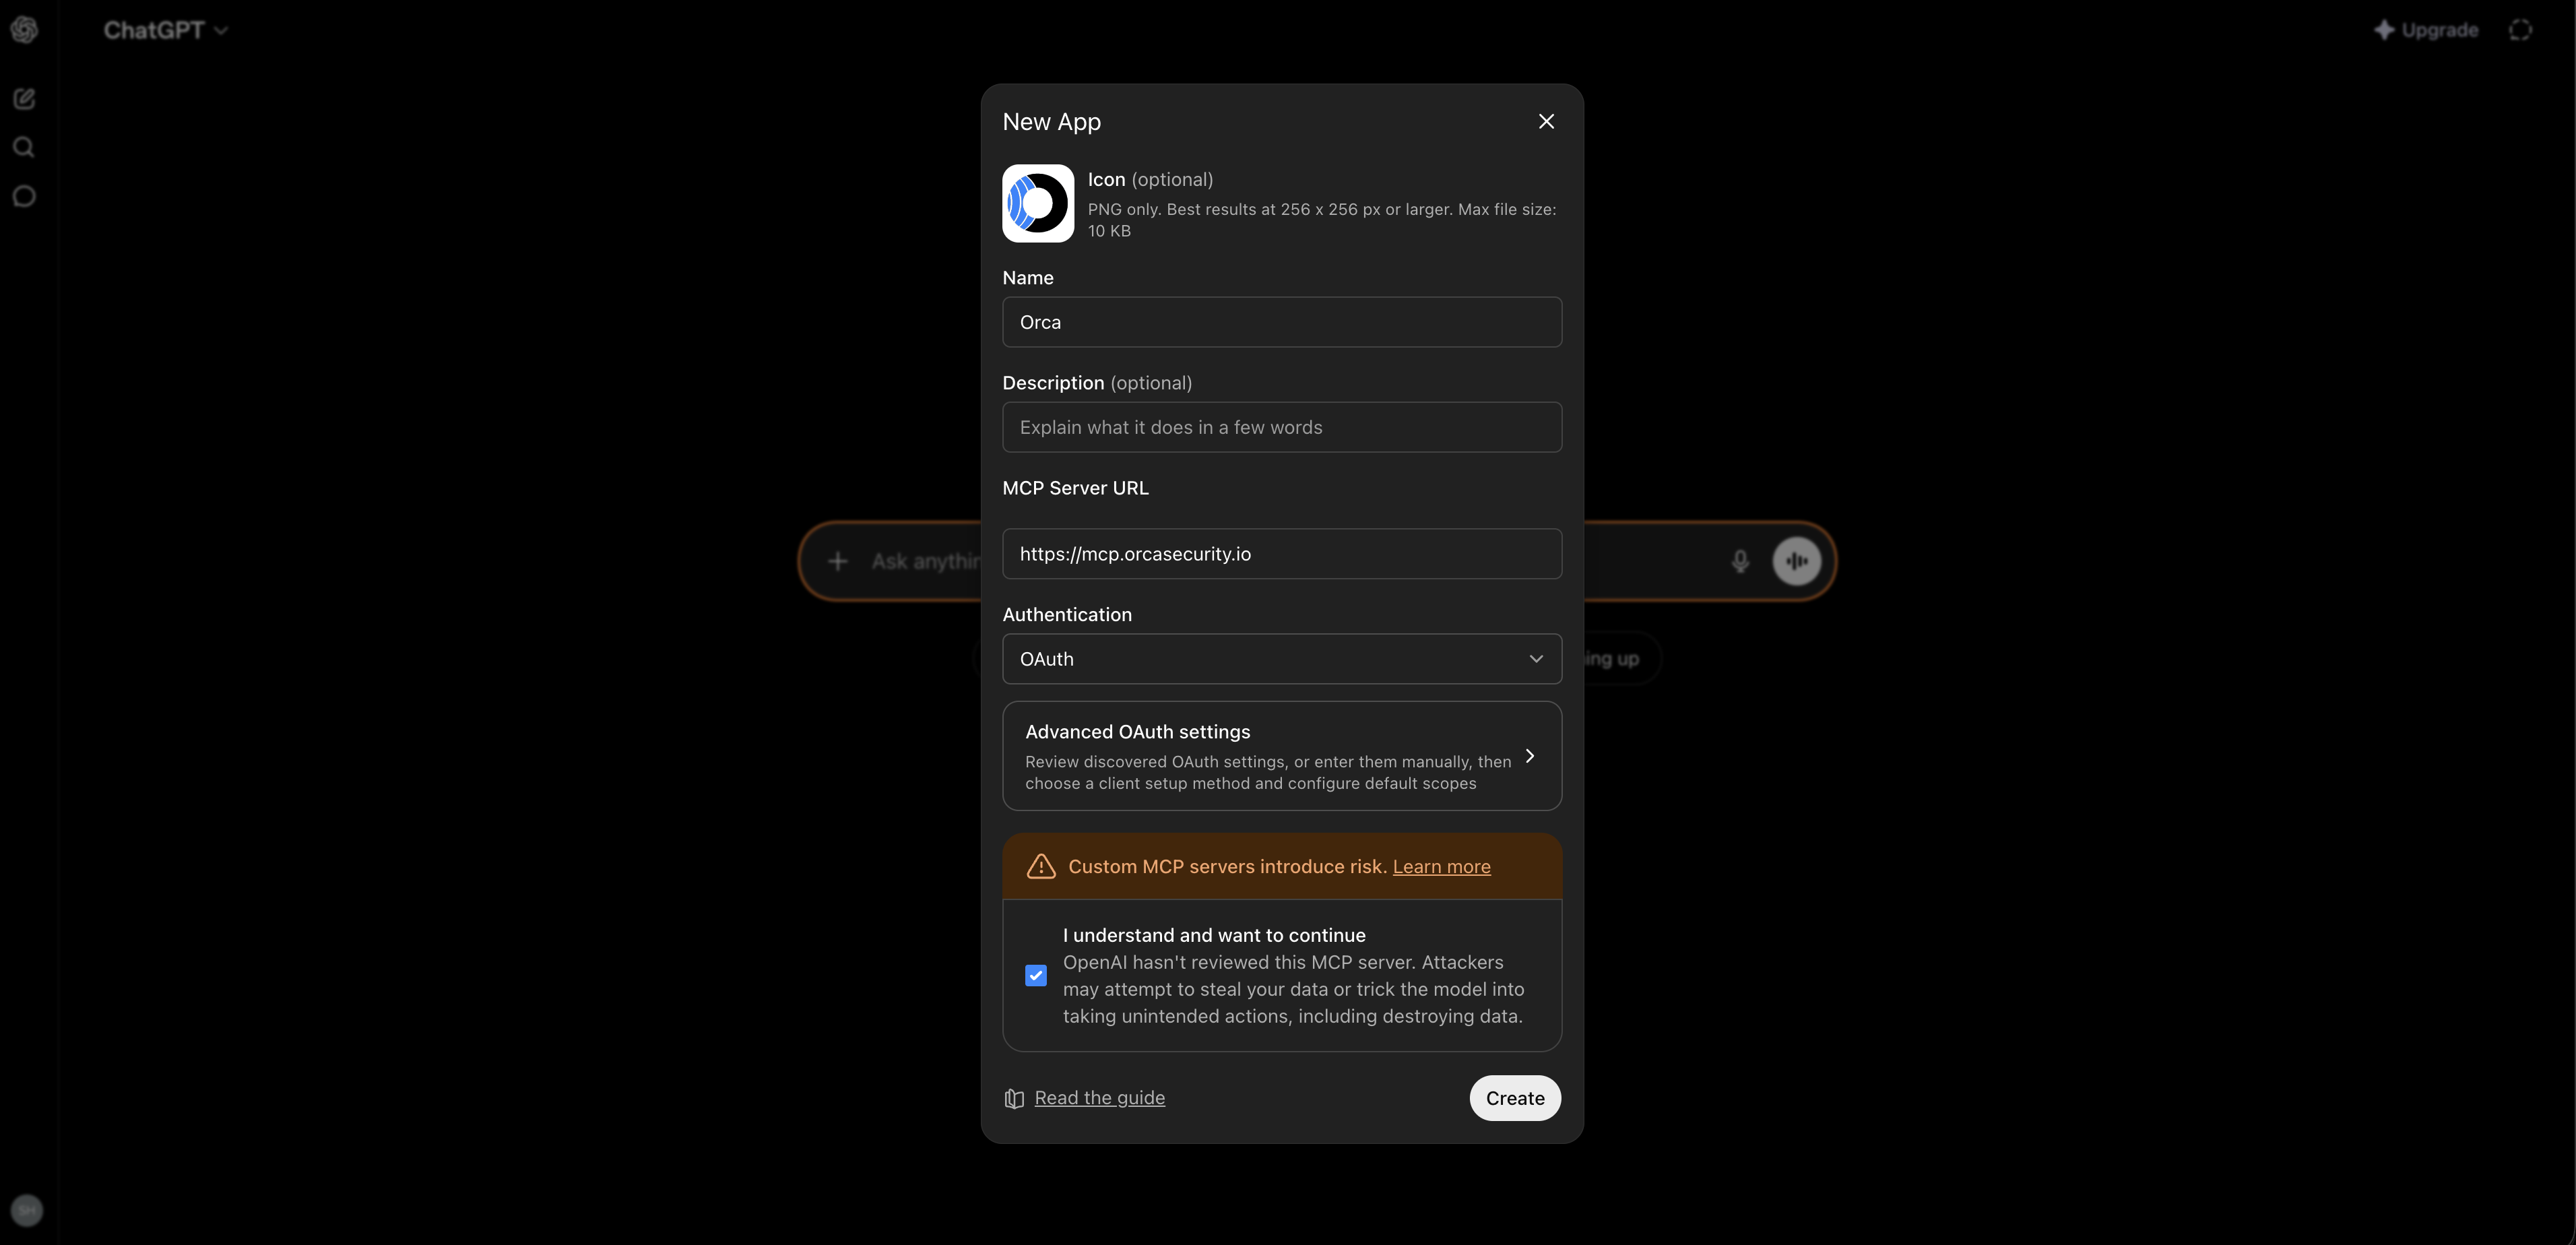
-
Click Create.
-
Test the connection using the query examples.
Connecting via JSON Configuration
For clients that don't provide a graphical setup interface, or if you prefer manual configuration, add the Orca MCP server directly using a JSON entry.
For OAuth-based connections, provide the URL. Your client handles authentication automatically when it first connects.
{
  "orca": {
    "type": "http",
    "url": "https://mcp.orcasecurity.io"
  }
}
For token-based connections:
{
  "orca": {
    "type": "http",
    "url": "YOUR_REGIONAL_ENDPOINT",
    "headers": {
      "Authorization": "Token YOUR_ORCA_TOKEN"
    }
  }
}
Replace YOUR_REGIONAL_ENDPOINT with your regional endpoint, for example, https://api.orcasecurity.io/mcp, and YOUR_ORCA_TOKEN with your Orca API token. The central endpoint (https://mcp.orcasecurity.io) supports OAuth only.
Query Examples
- "Use
discovery_searchto get critical alerts in progress." - "Use
discovery_searchto list internet-facing assets." - "Use
get_asset_by_idto retrieve the asset withasset_idyour_asset_ID." - "Use
update_alert_statusonorca-1234toin_progress." - "Use
get_alert_attack_path_dataonorca-1234." - "Use
get_aws_effective_permissions_policy_on_assetforarn:aws:iam::123456789012:role/ExampleRole." - "Use
documentation_searchto find how to add a label to an assets."
Supported Tools Examples
Orca supports a growing set of tools for querying and acting through your AI assistants. The following list shows example tools and is not a complete list. Orca continuously adds new capabilities.
- Alerts
get_alert(alert_id)update_alert_status(alert_id, status)wherestatusin {open,in_progress,resolved}get_alert_attack_path_data(alert_id)get_alerts_with_similar_malware(alert_id, asset_unique_id)get_alerts_with_similar_alert_type(alert_id, alert_type)get_other_secret_occurrences(alert_id, secret_hash)
- Assets
get_asset_by_id(asset_id, model_type)get_asset_by_name(asset_name, model_type, name_match_limit)get_asset_by_alert_id(alert_id)get_aws_effective_permissions_policy_on_asset(asset_arn)get_scm_posture_alerts_on_asset(asset_id)get_code_origin(asset_id)get_terraform_chain(asset_id)get_assets_with_similar_malware(sha256)
- Discovery
discovery_search(search_phrase)→ returns up to 10 results and anapp_urlto explore more in the Orca app
- Documentation
documentation_search(question)
Best Practices for Querying
- Write effective queries
- Be specific: Include cloud provider, region, environment. For example, "critical vulnerabilities in production AWS us-east-1"
- Use natural language: Ask as you would ask a security analyst
- Add context: Specify asset types, compliance frameworks, or vulnerability types for more accurate results
- Progressive query refinement
- Start with broad queries: "Show all critical vulnerabilities"
- Narrow down based on initial results: "Focus on vulnerabilities in public-facing services"
- Chain-related queries for comprehensive analysis
- Time-based queries
- Use temporal filters: "vulnerabilities discovered in the last 7 days"
- Track changes & analyze trends: "new security issues since last week"
- Combine multiple criteria
- Mix security concerns: "critical vulnerabilities in PCI-scoped systems"
- Combine asset and risk data: "publicly exposed S3 buckets with sensitive data"
- Cross-reference different security domains: "EC2 instances with high-privilege IAM roles and known vulnerabilities"